

06. 1. 2026
Oil Leak Diagnosis Steps That Actually Work
That burnt-oil smell at a stoplight or the dark spots on your driveway usually show up before a bigger problem does. Good oil leak diagnosis steps help you figure out whether you are dealing with a loose filter, a worn gasket, or a leak that could put your engine at risk if you keep driving.
Oil leaks are easy to ignore when the car still seems to run fine. The trouble is that engine oil does more than keep parts slippery. It helps control heat, reduce wear, and protect internal engine components that cost far more to repair than the leak itself. A small seep might stay manageable for a while, but an active leak can turn into low oil levels, smoke from oil hitting hot parts, or damage that could have been avoided with earlier service.
Why oil leaks can be tricky to diagnose
The hardest part about tracking an oil leak is that oil travels. Airflow under the hood and while driving can push oil away from the original source, so the spot you see may not be where the leak started. A valve cover gasket leak can make the lower engine look wet. A bad oil filter seal can drip onto surrounding components and create a mess that points in the wrong direction.
That is why guessing usually wastes time and money. Replacing the first gasket that looks suspicious is not always the right answer. Proper diagnosis means checking oil level, cleaning the area if needed, inspecting likely leak points, and confirming the source before recommending repairs.
Oil leak diagnosis steps you can follow first
If you suspect an oil leak, start with the basics. Park on a level surface and let the engine cool down. Then check the dipstick. If the oil level is low, do not put off adding the correct oil before driving much farther. Diagnosis matters, but protecting the engine comes first.
Next, look at the fluid itself. Fresh engine oil is usually amber to brown, while older oil is darker. This matters because vehicles can also leak transmission fluid, power steering fluid, or coolant, and each points to a different repair. If the spots are dark brown or black and feel slick, engine oil is a likely culprit.
Place a piece of clean cardboard under the vehicle overnight if the leak is not obvious. That can help you see where the drip lands relative to the front, middle, or rear of the engine bay. It is not a perfect test, but it gives you a starting point.
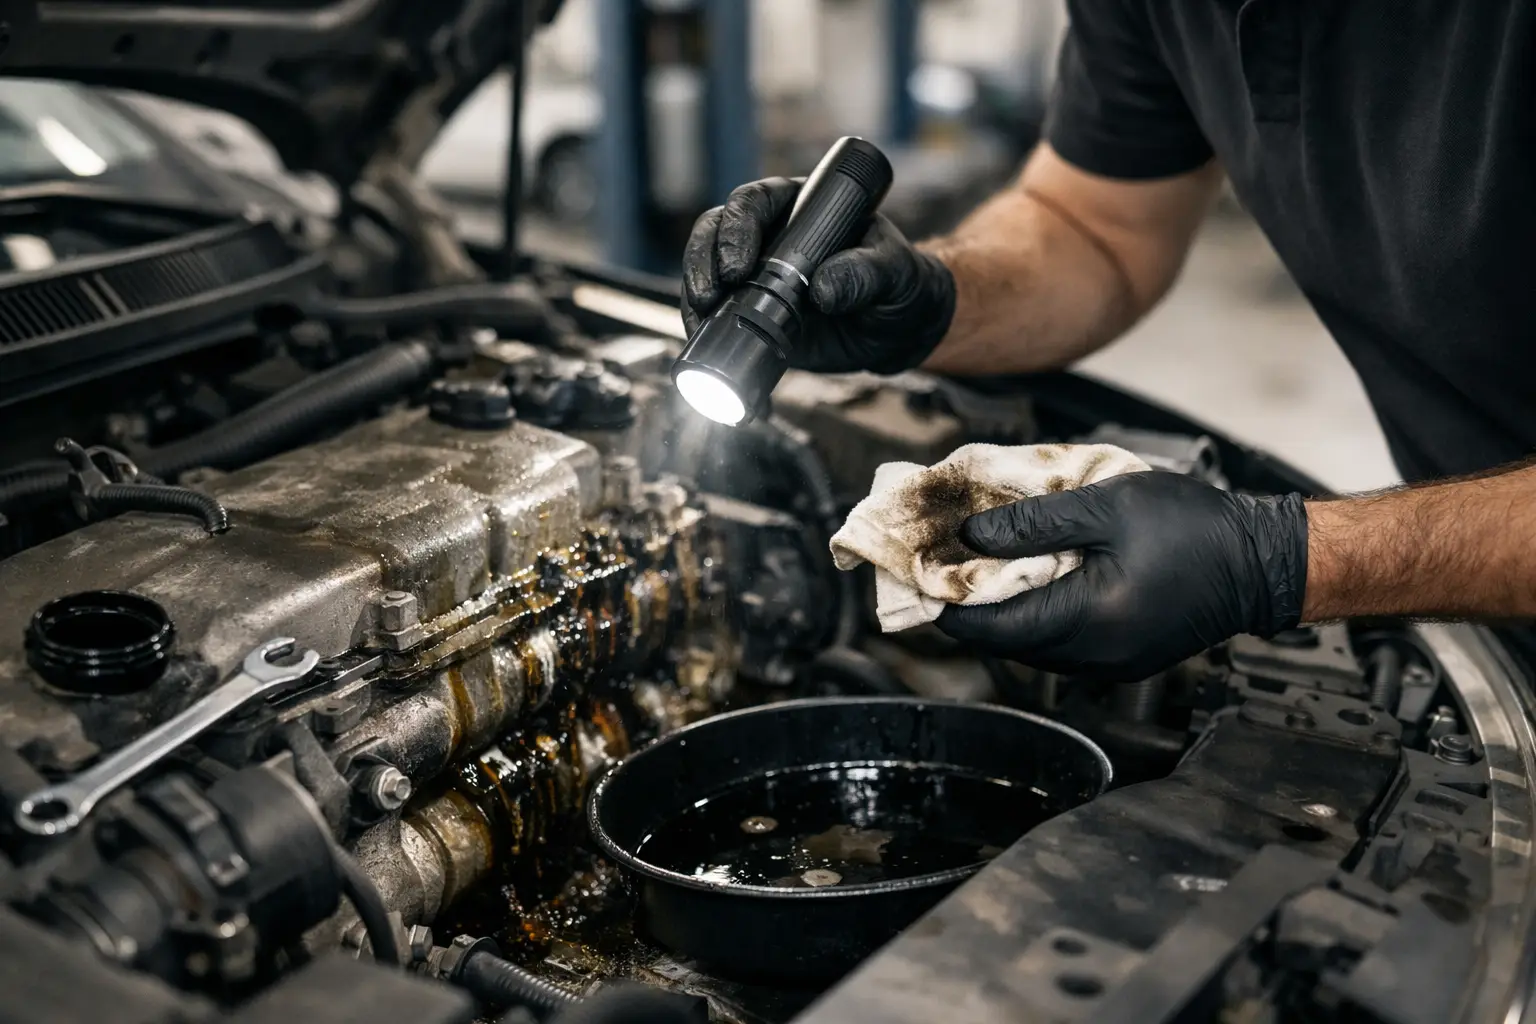
After that, open the hood and inspect visible areas with a flashlight. Look around the oil fill cap, valve cover, and the upper engine surfaces for wet, shiny buildup. Then check underneath, especially around the oil pan, drain plug, and oil filter. If everything looks dirty and coated, the engine may need to be cleaned before the leak source becomes clear.
Common places oil leaks start
Some leak points are much more common than others. Valve cover gaskets often leak as they age and harden. When they do, oil may collect along the top or side of the engine and sometimes drip onto the exhaust, which can create a burning smell.
Oil pans and oil pan gaskets are another frequent source, especially on older vehicles or cars that have hit road debris. A damaged drain plug or worn drain plug washer can also cause a slow drip after an oil change.
The oil filter is worth a close look too. If it is loose, cross-threaded, or installed with a damaged gasket, it can leak quickly. In some cases, the old filter gasket sticks to the mounting surface and creates a double-gasket condition when the new filter is installed. That can lead to a serious leak once oil pressure builds.
Front and rear main seals are more involved. These seals are located where the crankshaft exits the engine, and leaks there can be harder to spot without a lift and more detailed inspection. They also tend to be more labor-intensive repairs. Then there is the oil pressure sensor or sending unit, which can leak externally and mimic a gasket problem.
When a leak is a seep and when it is a real problem
Not every oil leak carries the same urgency, but none should be ignored for long. A light seep that leaves residue but rarely drips may not require emergency action today. It still needs attention because seals usually do not improve with age, and what starts small often becomes more expensive later.
A real problem is when you see fresh drops regularly, notice smoke from the engine bay, smell burning oil while driving, or have to top off oil between normal service intervals. If the oil warning light comes on, stop driving as soon as it is safe. That light can mean pressure is already too low, and continuing to run the engine can cause major damage fast.
There is also a safety side to this. Oil leaking onto hot exhaust components can create smoke and, in rare cases, fire risk. Oil on suspension or rubber components is not great either, and oil spots on your driveway usually mean the problem is active enough to keep worsening.
Oil leak diagnosis steps a professional shop uses
At a repair shop, diagnosis goes beyond a quick glance. One of the first steps is confirming that the leaking fluid is engine oil and checking the oil level and condition. From there, the technician inspects the engine from above and below, often using a lift to see areas that are impossible to evaluate well from the ground.
If the engine is heavily coated, cleaning is often part of the process. That may sound simple, but it is one of the most important oil leak diagnosis steps because a dirty engine can hide the starting point. Once the area is clean, the technician can run the engine, recheck for fresh oil, and trace where it appears first.
In some cases, UV dye is added to the oil. After the vehicle runs, a UV light helps reveal the exact leak path. This is especially helpful for slow leaks, multiple leaks, or situations where oil spreads across several surfaces before dripping.
A good shop also checks for related issues. Excess crankcase pressure, a clogged PCV system, or poor-quality previous repairs can all contribute to leaks. If you only replace the leaking gasket but miss the pressure problem behind it, the leak may come back.
What not to do when you find oil leaking
The biggest mistake is assuming every leak can be solved with an additive. Some stop-leak products may temporarily swell seals, but results are mixed, and they do not fix torn gaskets, damaged pans, loose filters, or cracked housings. They can also complicate future repairs depending on the condition of the engine.
Another mistake is washing the engine and calling it fixed. Cleaning helps with diagnosis, but if oil comes back, the source still needs repair. And while it is tempting to keep driving and just add oil now and then, that only works until it does not. One missed oil check can turn a manageable repair into engine damage.
Be careful about overtightening things too. An oil filter, drain plug, or valve cover fastener tightened too much can create a new problem by damaging threads or crushing seals.
When to bring your car in
If you see fresh oil under the vehicle more than once, smell burning oil, or cannot tell where the leak is coming from, it is time for a proper inspection. The same goes for leaks near the timing cover, rear main seal area, or anywhere around hot exhaust components. Those are not great candidates for guesswork in the driveway.
For many drivers, the most practical move is to have the leak diagnosed early, while it is still small enough to limit repair costs. At Firestone1960, that usually means identifying the source clearly, explaining what is urgent versus what can be monitored, and giving you repair recommendations without pressure. That kind of clarity matters when you depend on your vehicle every day.
Oil leaks rarely fix themselves, but they also do not have to become a worst-case scenario. Catch the signs early, check the oil level, and let a qualified technician confirm the source before a small spot on the driveway turns into a much bigger repair bill.
Social Share:




No Comment Yet! You can post first response comment.